Getting started with GitLab
The University has a GitLab instance [VPN], which researchers can use to host Git repositories. It also provides other features to complement this core function, which I’ll touch on below. First of all, a few preliminary things to consider:
- Repositories on GitLab cannot be made public; you’ll need to clone your repository to GitHub.com or similar to if you wish to make it public.
- GitHub.com may also be more appropriate for collaborations with people outside the University. Academic users can apply for unlimited private repositories.
- To get access, you need to contact the IT Service Desk, as per the details on the IT Support File Storage page.
- You’ll need to use the VPN to get access off-campus.
- If you want to know more about Git, watch out for our Software Carpentry workshops. The Git lesson material is also available online.
For the rest of this post, I’ll assume that you’ve got access to the University GitLab instance and know how to use Git.
Finding your way around
First things first – signing in. Head to the login page [VPN] and log in as an LDAP user with your University username and password.
After logging in, you should see the GitLab dashboard [VPN]. If you’re associated with any projects, they should be listed in the main part of the page. There are a number of menus and other links in a purple navigation bar across the top of the screen, which is present on all pages in GitLab. There’s more here than I can cover in a blog post, but I’ll mention a few of the most significant items. Note that the exact location and appearance of buttons and menus may vary depending on your screen size.
Help
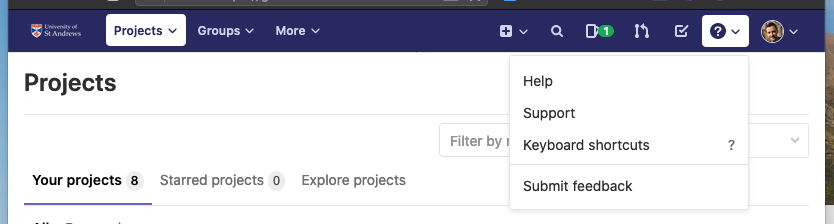
GitLab’s own help materials [VPN] can be accessed from a menu in the top bar. If you’re having trouble with GitLab and can’t find the solution there, get in touch with the IT Service Desk.
Settings
Settings [VPN] are also accessible via a menu in the purple bar. There are lots of things which can be tweaked here, though if in doubt stick with the defaults. One section you’re likely to need to look at, though, is SSH Keys [VPN]. You’ll need an SSH Key to interact with GitLab via the command line or a desktop Git client over SSH. GitLab includes instructions on generating SSH keys [VPN], but if you need assistance, please contact Research Computing.

Projects
If you’re not currently viewing the dashboard, your projects (Git repositories) can be found via the “Projects” menu in the navigation bar.
Groups
A project in GitLab typically belongs to a Group; users belong to one or more Groups. You can view the Groups you belong to from the “Groups” menu. Generally, you will have access to all the projects belonging to a Group of which you are a member; however, there are different membership levels [VPN] which dictate what you can do with the projects in a Group.
Groups can have subgroups with different memberships to the parent Group.
If you need access to a Group to which you do not currently belong, ask one of that Group’s owners. If you’re not sure who that is, contact the IT Service Desk. There are many Group-level features and settings which are beyond the scope of this post – check out the GitLab documentation [VPN] for details.
Working with Projects
GitLab refers to Git repositories as “Projects”. The web interface for navigating the files, commits, branches, tags, releases etc. in a Project is broadly similar to that of a GitHub repository – these are Git concepts independent of the different platforms. Issues are accessed by a menu within a project – these are, again, broadly similar to GitHub, as are wiki pages.
There are a range of project-level settings – again, if you’re unsure, just accept the defaults. One thing to note here is that under “Settings > Members” you can add as collaborators users who are not part of the Group to which the project belongs.
Projects also come with a host of features related to analytics, continuous integration/deployment, interactions with other systems (e.g. Microsoft Teams) [VPN] and more.
Creating a Project

To create a new Project, either for a new piece of work or to host a clone of an existing repository, first navigate to the Group to which the Project should belong. If you have the correct permissions, you should see a big green “New project” button. After clicking this, you’ll be walked through a process which is, again, very similar to that on GitHub. After filling in some basic details to create the Project, GitLab will present you with the commands you need to clone it to your computer, or to push an existing repository to it.
This is just the start
This post is just the briefest of introductions to GitLab – it has many features, many of which I haven’t used myself. Again, check out GitLab’s documentation to read more on any particular aspect. GitLab is a widely used product, so you may find useful information elsewhere on the internet too. Finally, feel free to email [email protected] if you have questions or want help; alternatively, you can try the Research Support Team on Microsoft Teams (open to all) or even chat with me via Teams.